
Email: support@lmplx.uk
Phone: +85246071534
Address: UNIT 21 3/F YAU LEE
CENTER NO.45 HOI YUEN
ROAD KWUN TONG KL
Business Hours: Monday-Friday from 9am to 5pm
LED outdoor lights have many advantages, making them a great choice. They use much less energy than regular bulbs, saving power. For example, they can cut electricity use by 172.46 kWh yearly. This could save you about £15.30 each year. These lights also last longer, so you replace them less often. This means you save more money over time.
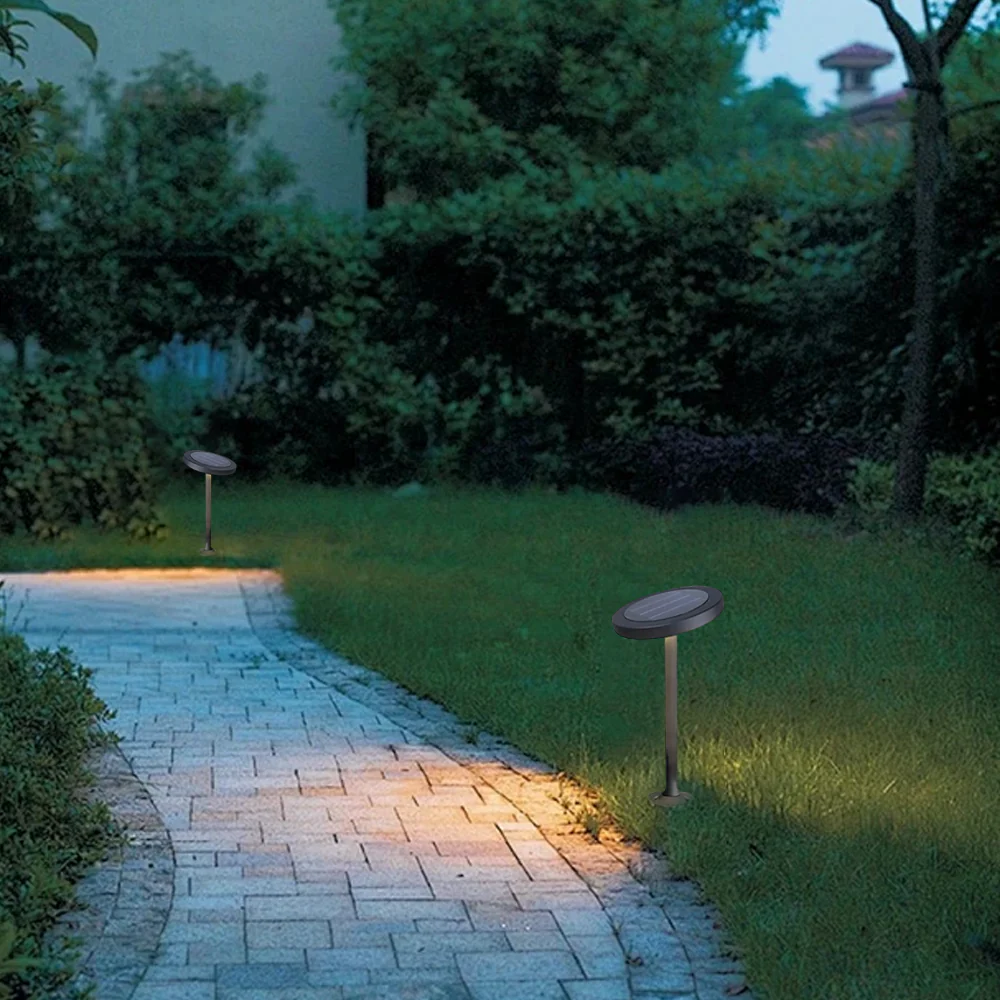
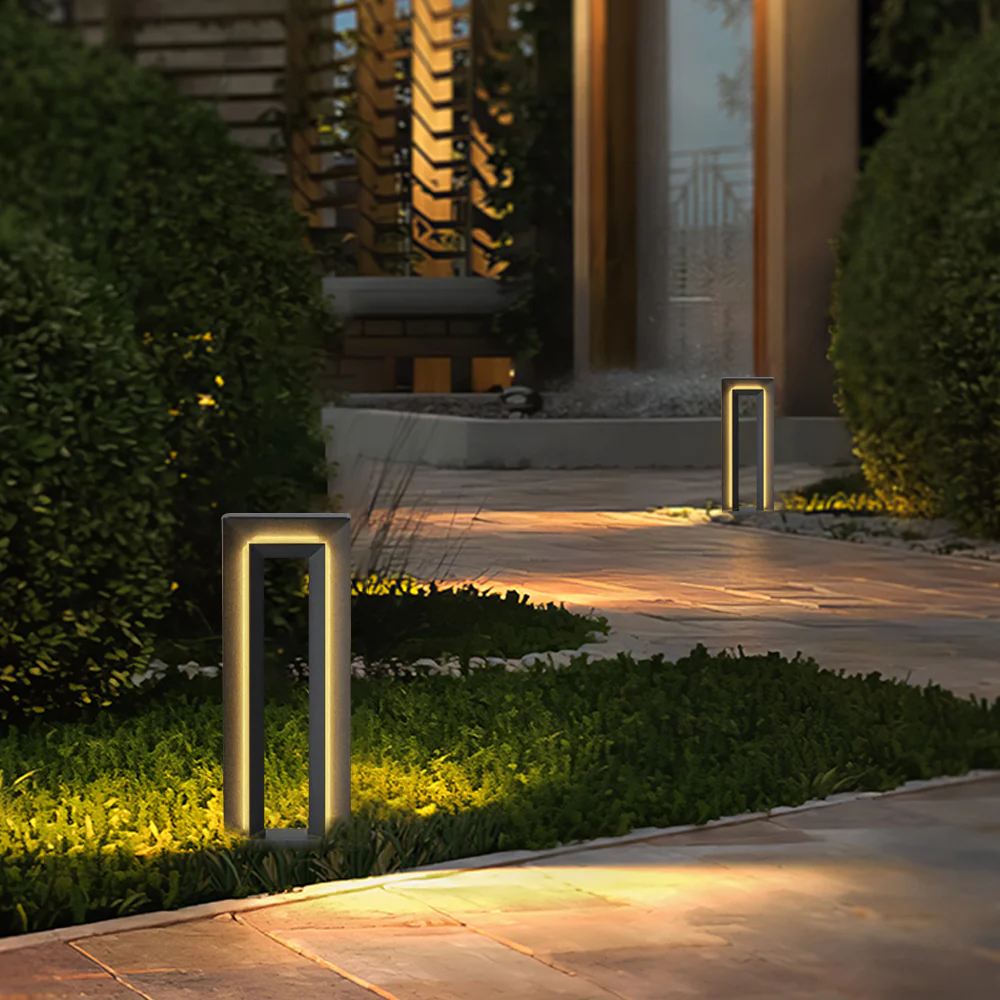
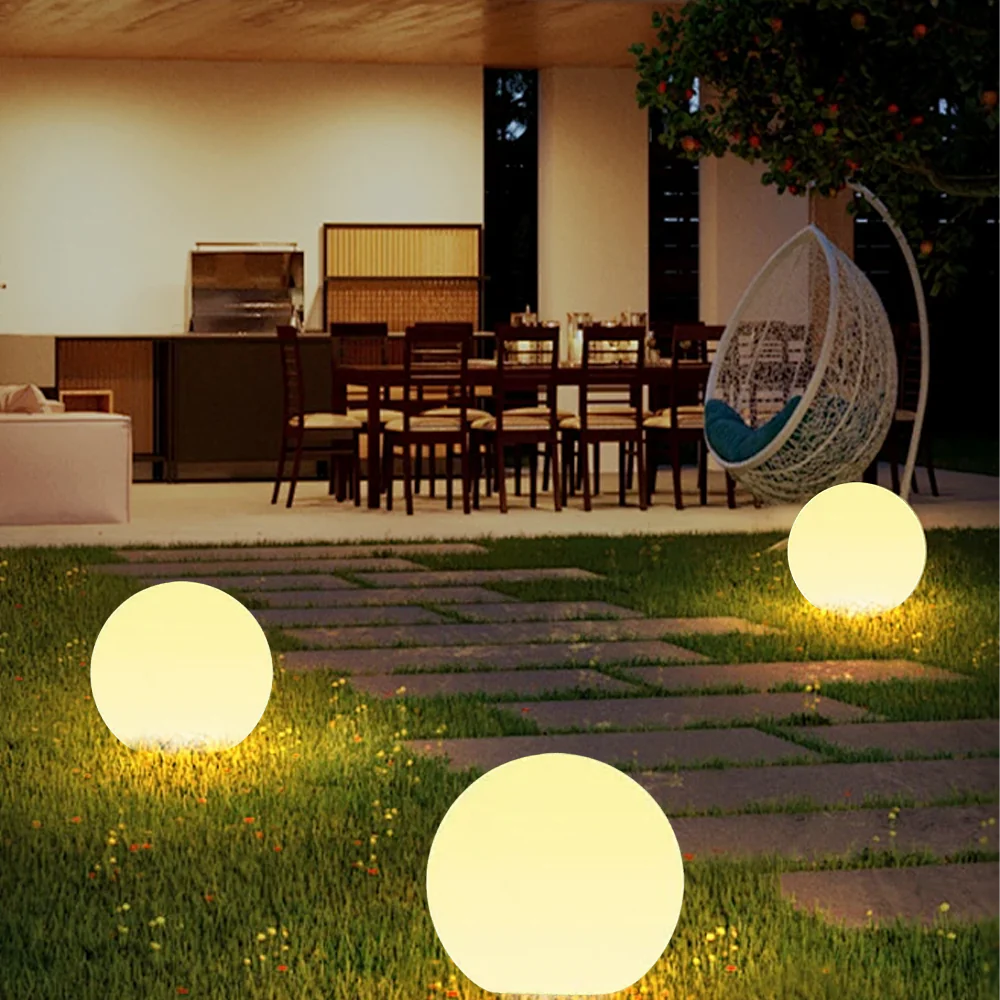
LED outdoor lights are also very strong and long-lasting. New designs make them brighter and work for longer periods. They are a dependable choice for lighting outside areas. Plus, they make your home look stylish. You can use them to show off your garden or light up paths. They make your space welcoming and improve how your property looks.
This guide will help you install these lights easily. You can quickly change your outdoor area with little effort.
LED outdoor lights use less energy and save money. They can cut electricity use by over 172 kWh a year, saving about £15.30.
Pick good-quality LED lights that are bright and strong. This makes them work well and look nice in your outdoor area.
Plan where to put your lights carefully. Use layers and balance to make the space welcoming without glare or dark spots.
Be safe when installing. Turn off power, use approved parts, and wear safety gear to avoid accidents.
Take care of your lights regularly. Clean them twice a year and check for damage to help them last longer and work better.
Choosing good LED outdoor lights is very important. It helps you save energy and get the look you want. Pick lights with high luminous efficacy (lumens per watt) for better efficiency. Check the brightness level (lumens) to match your needs. Choose durable lights that last long and work in your local weather.
The table below shows key things to check:
Specification Type |
Description |
|---|---|
Rated input power of LED luminaires |
Shows energy use in watts (W). |
Rated luminous flux of LED luminaires |
Shows total brightness in lumens (lm). |
Luminous efficacy of LED luminaires |
Shows efficiency in lumens per watt (lm/W). |
Chromaticity coordinates |
Tells the colour of the light. |
Longevity criteria for LED luminaires |
Tells how long the light will last. |
A good lighting plan makes your outdoor space look great. First, decide what areas, like paths or gardens, you want to highlight. Use layering to mix light levels and add depth. Keep the lighting balanced to avoid too much brightness or darkness. Use lights with similar colours for a neat look.
Principle |
Description |
|---|---|
Layering |
Combine different light levels for depth and interest. |
Focal Points |
Highlight key areas like pathways or garden features. |
Balance |
Keep lighting even to avoid glare or dark spots. |
Consistency of Colour |
Use lights with matching colours for a tidy appearance. |
Getting ready makes installation easier. Make a list of tools and materials. Group them into categories for quick access. You will need:
LED outdoor lights and fixtures.
Low-voltage transformers for garden lighting.
Electrical cables and connectors.
A shovel or trowel to bury cables.
A voltage tester to check safety.
Tip: Follow local rules to stay safe. For big projects, hire a professional to ensure proper setup and safety.
Staying safe while installing LED outdoor lights is very important. By following the right steps, you can avoid problems and finish the job easily. Below are key safety tips to remember.
Handling electricity needs extra care. Following safety rules keeps your work safe and correct. Here are some important tips:
Follow national electrical codes to meet safety rules.
Use certified electrical parts to ensure they are safe.
Add grounding and surge protection to avoid electrical dangers.
Use low-voltage power supplies that meet Class 2 rules. This lowers the chance of shocks or fires.
Make sure power supplies are easy to reach and approved by testing labs.
Tip: Always switch off the power before starting any work. Use a voltage tester to check there is no electricity in the wires.
Physical safety is as important as electrical safety. Taking care can stop injuries and help you do a good job. Below is a table of tips to reduce risks:
Safety Practice |
Description |
|---|---|
Secure Mounting and Placement |
Fix LED strips tightly to keep electrical parts covered. |
Electrical Safety |
Use good insulation and tight connections to avoid shocks. |
Fire Hazard Prevention |
Keep LED strips away from things that can catch fire. |
Regular Maintenance |
Check LED strips often to make sure they are safe and secure. |
Use of Certified Products |
Choose products with safety marks to meet safety standards. |
Note: Wear gloves and goggles while working. These protect your hands and eyes from sharp objects or dust.
By following these safety tips, you can safely install your LED outdoor lights. If unsure about any step, ask a professional for help to ensure everything is done properly.
Getting the area ready makes installing LED outdoor lights easier. First, check the spot where you want to put the lights. Follow these simple steps to prepare:
Step |
Description |
|---|---|
1 |
Find and mark underground pipes or wires to avoid damage. |
2 |
Remove any rubbish, plants, or obstacles from the area. |
3 |
Use stakes, string, or a hose to outline the space. |
After marking the area, plan where the cables will go. Dig shallow paths with a shovel or small spade to hide the cables. Before digging, ask your local utility company to confirm where underground lines are. This step keeps you safe and avoids accidents.
Tip: Keep trenches shallow for low-voltage lights. This makes the job safer and quicker.
Fixing the lights properly keeps them steady and long-lasting. Use clips or brackets to hold the lights in place. These tools help support heavier lights and spread their weight evenly. For walls or ceilings, clips work well as they reduce pressure on sticky parts.
When setting up garden lights, follow the maker's instructions. Attach the lights tightly so they stay safe from wind or rain. For pole lights, connect a grounding wire from the light to the pole and ground rod. This step improves safety and keeps the lights stable.
Note: Always use approved mounting tools for better results and safety.
The last step is connecting the lights to power. Start by attaching the lights to a low-voltage transformer. This device lowers risks and is easy for DIY projects. Follow these steps to finish:
Link each light’s cable to the transformer. Make sure they are secure.
Use a tester to check if the power is working properly.
Update dimmers or controls if needed for LED compatibility.
Test the system and adjust the lights if required.
Tip: Use waterproof connectors to protect wires from water. This helps your lights last longer.
By following these steps, you can set up your LED outdoor lights successfully. If you face problems, ask an expert to help you finish the job correctly.
Managing wires properly keeps your lighting safe and working well. Secure wires to stop accidents and protect them from damage. Bury wires in underground conduits to hide and shield them. Use PVC or metal conduits made for outdoor and underground use. These are strong and last a long time.
Check wires often for any damage. This helps you fix problems early and follow local rules. Run wires along deck posts or railings to keep them off the ground. This lowers the chance of tripping. Use good-quality clips and fasteners to hold wires firmly in place.
Tip: Bury wires at the same depth. This avoids damage when gardening later.
Hiding wires makes your outdoor space look better. You can hide wires but still keep them easy to reach. Place wires inside grooves on railings or behind wood trim. This hides them and gives a clean, finished look.
In gardens, cover wires with mulch or gravel to blend in. Use landscape edging to tuck wires away neatly. Add planters or thick plants to naturally hide wires. Decorative items can also help wires match your outdoor style.
Flush access panels are useful for hiding outlets or controls. These panels can match your outdoor design for a smooth look. They also let you reach important parts without ruining the appearance.
Note: Always make sure wires are easy to reach for repairs. A good balance of looks and function is important for success.
Testing makes sure your outdoor lights work properly. Start by checking each light to see if it turns on. Use a digital multimeter to check voltage levels. This tool shows if the lights get the right power. To test an LED, connect the black probe to the negative side and the red probe to the positive side. If you don’t have a multimeter, use a coin cell battery holder instead.
Outdoor LED lights need to handle tough weather. Test their strength using key performance checks. The table below explains what to test:
Testing Aspect |
Description |
|---|---|
Weather Resistance and Durability |
Check IP ratings (IP65, IP67) and test for UV, salt, and temperature changes. |
Brightness and Beam Coverage |
Measure brightness and check beam angles for good coverage. |
Colour Temperature and Rendering |
Use colour temperatures (3000K–5000K) and CRI of 80+ for natural colours. |
Energy Efficiency |
Test efficiency (lm/W) and ensure power factor (PF) is above 0.9. |
Heat Dissipation |
Check heat sinks and ensure they meet thermal standards. |
Longevity and Maintenance |
Test lifespan and ensure designs allow easy maintenance. |
Electrical Safety and Surge Protection |
Follow safety rules (UL, CE, IEC) and test surge protection. |
Flicker and Light Quality |
Check for flickering and ensure even light distribution. |
Environmental Impact |
Ensure compliance with Dark Sky rules and use recyclable materials. |
Smart Controls and Connectivity |
Test compatibility with control systems in different conditions. |
Tip: Always test your lights after setting them up to ensure they meet these standards.
Sometimes, issues happen even with careful planning. Fixing these problems quickly keeps your lights working well. Below are common problems and how to solve them:
Flickering Lights: This happens due to loose connections or old bulbs. Tighten connections and replace bad parts.
Dim or Uneven Lights: Voltage changes or faulty drivers can cause this. Use a multimeter to check voltage.
Overheating Lights: Wrong wattage or too much power can cause overheating. Match the wattage to the fixture.
Lights Burning Out Quickly: High voltage or vibrations can damage lights. Check the power and secure fixtures.
Wrong Light Output: Adjust the light positions to get the right effect.
To keep your lights in good shape, follow this checklist:
Test all controls to ensure they work.
Check ballasts and drivers for noise or overheating.
Replace bulbs before they stop working.
Monitor energy use and upgrade for better efficiency.
Check emergency systems and keep records for repairs.
Note: Regular checks and quick fixes stop small problems from becoming big ones.
Taking care of your LED outdoor lights helps them last longer. Clean them often to remove dirt and dust. This keeps the lights bright and working well. Use a soft cloth or sponge to clean the fixtures gently. Do not use harsh cleaners, as they can harm the surface. Check the seals and lenses for cracks or damage. Broken seals can let water in, causing electrical problems.
Set up a cleaning routine for your lights. Twice a year is usually enough. If your area is dusty or polluted, clean them more often. Regular checks help you spot problems early. Look for loose wires, rust, or overheating signs. Fixing these quickly can save you money on repairs.
Outdoor LED lights are built to handle tough weather. They have strong covers, rust-proof materials, and sturdy lenses. Following the maker’s setup instructions also helps keep them working well. Proper installation stops overheating and keeps them stable for a long time.
Improving your lighting system can make it look better and work smarter. First, check your current setup. Find spots where extra lights could help, like paths or trees. Adding smart features like timers or motion sensors makes the system easier to use and saves energy.
When adding new lights, choose energy-saving options. For instance, switching old lights to modern LEDs can cut energy use a lot. Studies show replacing all U.S. streetlights with LEDs could save $1 billion yearly. In New York City, LED streetlights save $6 million on energy and $8 million on maintenance each year.
Use good-quality parts for new lights. Weatherproof and rust-resistant materials last longer outdoors. New LED designs, like shatterproof covers, make lights even stronger. By upgrading with quality materials, you can build a reliable and stylish lighting system.
Tip: Plan upgrades carefully to keep a matching look. Use lights with the same colour and style for a neat finish.
Putting up LED outdoor lights makes your space useful and stylish. Follow this guide to plan, stay safe, and finish the job easily. Keeping wires tidy and doing regular checks will help your lights last longer.
LED lights have many advantages. They use less energy than old bulbs and last longer. Though they cost more at first, they save money over time and lower carbon emissions. The table below shows key facts:
Fact |
Detail |
|---|---|
LED light market share (2024) |
|
Energy use vs. old bulbs |
Much lower |
LED lifespan |
Very long |
Starting cost |
Higher |
Long-term savings |
Very cost-effective |
Cuts carbon emissions |
Yes |
Now that your LED lights are set up, enjoy the better look and use of your outdoor area. Try new ideas to show off your garden, paths, or home features. Your imagination can make your space stand out.
LED outdoor lights use less power and last much longer. They are tough and can handle bad weather. These lights also give brighter and more even colours, perfect for outside areas.
Yes, you can install LED outdoor lights by following simple steps. Make sure to stay safe and use the right tools. For tricky setups, ask a professional to help you do it correctly.
Choose brightness based on the area you want to light up. Paths need softer lights, while security spots need brighter ones. Check the lumens on the box to find the right level.
Yes, most LED outdoor lights are made to handle rain. Look for lights with high IP ratings like IP65 or IP67. These ratings mean they are safe from water and dust.
Clean and check your LED outdoor lights twice a year. Wipe off dirt and look for loose wires or damage. Regular care keeps them working well and lasting longer.
